Don't use an Administrator user account
defense strategy for home computers
Don't use an Administrator user account when you don't need to Log on with a non-Administrator user account whenever possible. This step is extremely effective. It arbitrarily stops or cripples most "inside" attacks from viruses and spyware that attack Windows itself, and other software you use. If you have "problem" software which doesn't want to cooperate with your non-Administrator account, see these tips. Windows Vista has much better support for non-Administrators than Windows XP, so if you can use Vista, it'll make this step far easier.
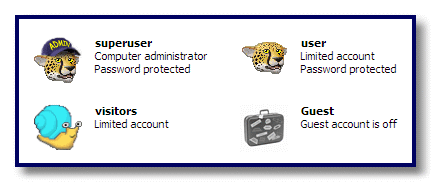
Don't let other people use the Administrator account on your computer. Make a separate non-Administrator account for visitors to use, so they're not logging onto one of your own user accounts.
How to change to a non-Administrator account
There always needs to be at least one Computer Administrator account. So if you've been using the computer's only Computer Administrator account as your regular "daily driver" account, you'll need to make a new Administrator account before you can switch your own account to a non-Administrator account. The following directions are for Windows XP, but Vista is similar.
In Control Panel, open User Accounts, click Create a new account and make a new account (I named mine superuser). Let it remain a Computer Administrator account.
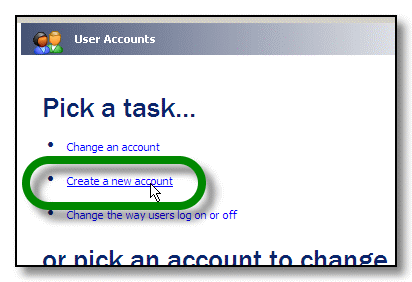
Now that you've got this new Administrator account, you have the option to set your account to a non-Administrator ("Limited," in this case).
Click Start > Log Off and log off. You should now see a Welcome screen showing the new Administrator account, as well as your regular account. Log into your new Administrator account.
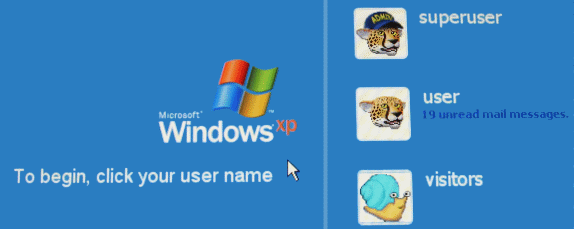
Go to User Accounts and click on your usual account:
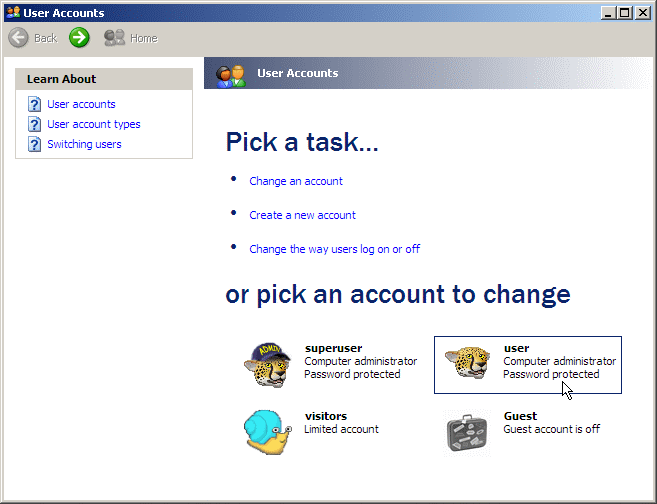
superuser is my new Administrator account. user is the account I've been using, which I want to change from Computer Administrator to Limited.
Click Change the account type:
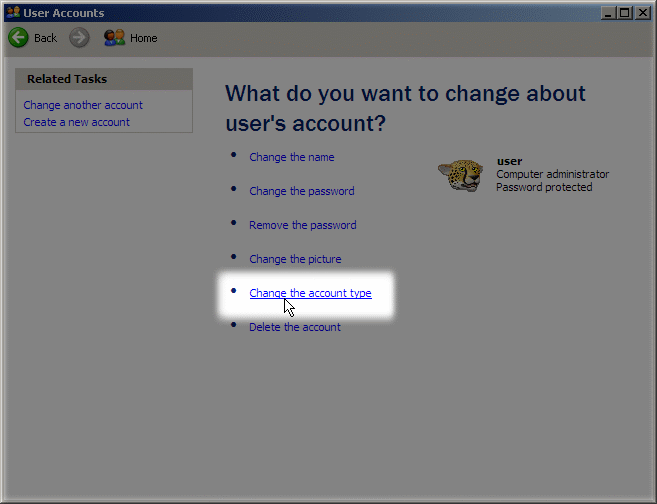
Above: I click Change the account type for my regular account, so I can change it to Limited.
Change the account to a non-Administrator (Limited), as shown in the picture below. If I want to reverse the change, I log into my Administrator account, and simply change this account back to a Computer Administrator again.
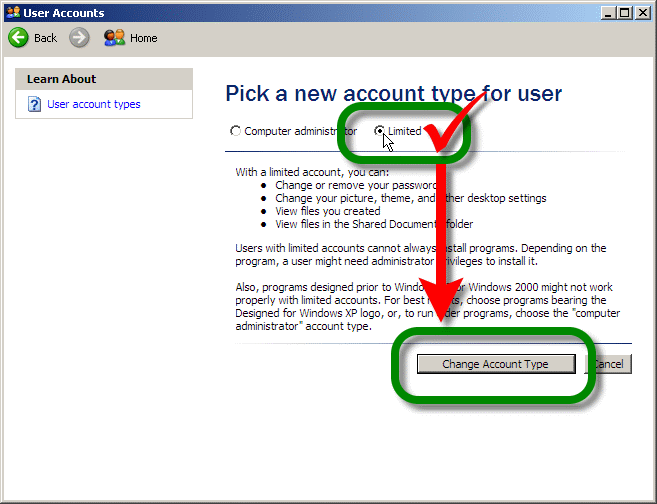
Now my account is a Limited account (below).
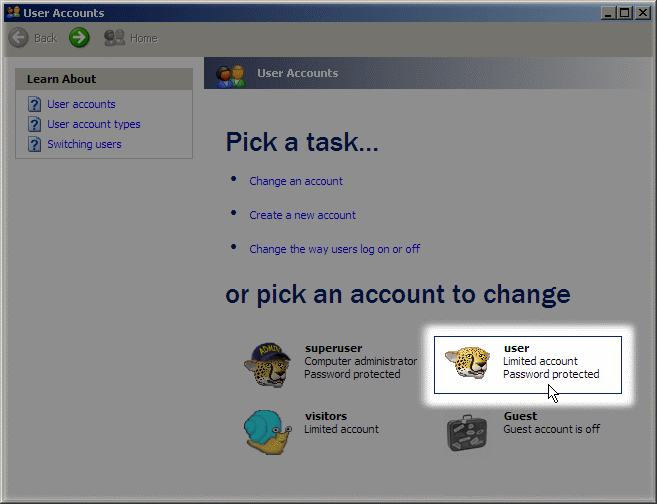
You're done! : ) The key idea is to only use your Administrator account when you actually need Administrator-level powers, such as when adding new hardware & software. For instant messaging, email, Web browsing and other daily computer use, use your non-Administrator account.
If you have Windows XP Professional Edition, or Vista Business or Ultimate Editions, take another two minutes and follow my easy Software Restriction Policy instructions too. To see what version of Windows you have, just click Start > Run, type winver in the box and click OK.

So if this is so effective, why don't more people do it? There's GOT to be a catch. Some software doesn't work correctly when you run it from a non-Administrator account. If you have problems, try the following tips, (Windows Vista is specifically designed to handle this stuff better)
Step 1 Check whether there's a patch that fixes the problem. There's an update for The Sims 2, for example, that makes it work under Limited accounts among other things.
Step 2 Temporarily change your Limited account to a Computer Administrator account, run the software once, then close it and change your account back to Limited. This is all it takes for some programs to get their act together.
Step 3Start the computer in Safe Mode by pressing the F8 key repeatedly when you anticipate that the first WindowsXP bootup screen is about to show. This gets you access to the Security and Permissions tabs when you right-click folders and choose Properties.
Find the program's folder within C:\Program Files, right-click it, and give the Users group Full Control Security. Some programs also have a folder in the C:\Program Files\Common Files folder and in the C:\Documents and Settings\All Users\Application Data folder (which is a hidden/protected OS folder), so check those too and adjust their Security also.

No comments:
Post a Comment